I have wanted to set up password less access to my SSH servers for several years, but due to laziness mainly have never got around to actually completing the process. Just now I accessed one of my hosting accounts without any password and it actually felt quite good. It is one of these things that you think to yourself “Why didn’t I just do it before!”.
I encountered some issues even though the process is a piece of cake and takes less than five minutes to do. When searching for solutions I tend to encounter issues with out-of-date information that no longer applies to the latest versions of software normally used. It can become annoying sometimes as you may be wasting time down the wrong path.
I will try to write it up as simple as possible for anyone who might like to give this a go. The easiest way to get started would be to simply install the entire Putty Windows installer. Currently at version 0.60 but ensure you grab the latest version available when starting.
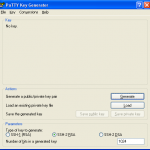
Once installed go to Start > Putty > PuttyGen and the key generator will open:
Click on “Generate” and you will see a progress bar appear:
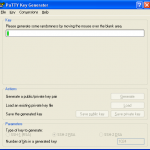
Now you need to create some randomness by hovering your mouse pointer on top of the progress bar so it slowly moves towards the end. When done you will see your public key:
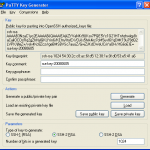
Now simply enter a key passphrase you can remember which is longer than a normal password. This needs to be used to decrypt the key when used. I will later explain how you avoid having to input this long passphrase on every login, elsewise it would defeat the purpose of not wanting to repeatedly input the password. Please note the passphrase can NOT be recovered, although you may always generate a new set of private/public keys if you happen to forget it.
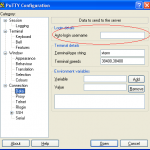
Once you have entered the passphrase twice hit “Save private key” and save the file with any name in a safe location and leave PuttyGen running as we will use it again in a bit. This leads to the next step which is to launch Putty as you normally do from Start > PuTTY > PuTTY. Go to the Connection > Data tab and input the username of the SSH account:
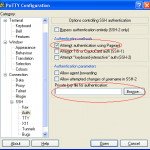
Now move down to Connection > SSH > Auth tab and only check “Attempt authentication using Pageant”. Click on the “Browse” button and locate the private key that you created before with PuttyGen:
Now you are ready to save this to your profile. Return to the first tab Session and enter your hostname and a session name to save these profile changes. Click “Save” and the “Open”:

On connecting you may receive an error about invalid keys or similar, just login as usual with your password only. Your username should have been automatically passed to the server by Putty as per your change in Putty’s configuration earlier on.
Run the following commands:
mkdir ~/.ssh
vi ~/.ssh/authorized_keys
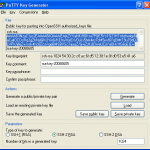
Now Vi will open which is a text editor and we should see an empty file where we can paste in the public key you generated before. Return to your open PuttyGen and click the public key section, select ALL text and copy. This step is where I personally went wrong and only copied the bit that is highlighted initially upon the first click within the section. You have to make sure you select ALL the text:
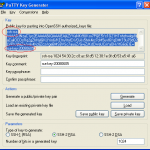
Now you need to return to your open session in Putty and paste the public key into Vi. First hit the letter “i” to insert and then right-click on the screen to paste the content. If it pasted correctly hit the “Esc” button on your keyboard followed by:
:wq
This should save your public key at the server and close Vi. Now check for the correct permissions by running:
chmod 700 ~/.ssh
chmod 600 ~/.ssh/authorized_keys
exit
Putty should now close and Pageant should be launched by going to Start > PuTTY > Pageant. This is a very simple utility that will store your key’s passphrase in memory until you close it again. This is needed to avoid having to type your long passphrase upon every login, the alternative being creating a key without any passphrase which is highly insecure as anyone can login to your server if they get hold of your private key.
Simply click “Add Key” and locate your private key stored earlier. Enter your passphrase when asked and close it so it stays minimised in the traybar:

Now you should be able to launch PuTTy again and simply double click on your saved session profile to access your SSH server without any further user input.
